
The Library, application in Django 1.8 | Part I
- The Library, application in Django 1.8 | Part I
- The Library, application in Django 1.8 | Part II
- The Library, application in Django 1.8 | Part III
- The Library, application in Django 1.8 | Part IV
- The Library, application in Django 1.8 | Part V
- The Library, application in Django 1.8 | Part VI
- The Library, application in Django 1.8 | Part VII
The Beginning.
Today we are going to start an intermediate level application (in my opinion) in Django 1.8, we will use a good handful of concepts, singularities and help that this great web framework offers us, the idea is that at the end of this app, you can continue on your own in creating your own applications or add more functionalities to the one we are going to build.
To follow this series of posts I assume that you already have Python, Django and Virtualenv installed and configured, although the latter is not a primary requirement to follow these posts. We will create a virtual library, where our users will be able to upload books to our platform, they will be able to create a book, edit it or delete it. It should be said that I will use the Windows 7 operating system, if you have not managed to configure Python and Django in this operating system, I recommend reading this entry:
Welcome then to your first application in Django, the web framework for perfectionists.
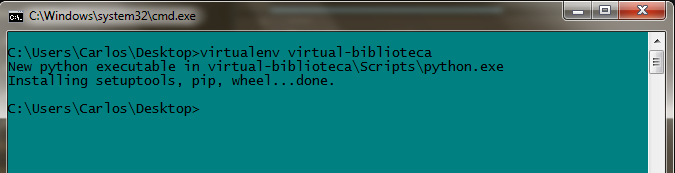
- Start the virtual environment: First things first, we must create our virtual environment, so we go to the place where we want to start our environment: in my case it will be on the desktop, we are going to open our console and in it we put
virtualenv virtual-library, we wait for the environment to be built:
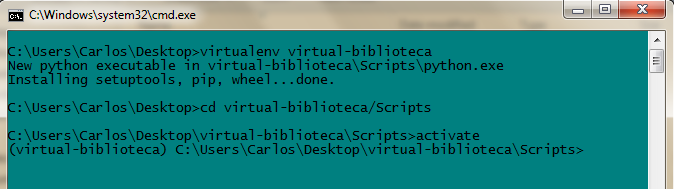
The next step is to activate the environment we have created. To do this we go to virtual-library/Scripts, where we write activate. We will see that when we press enter, we are given the name of our created environment in parentheses, which means that the environment has been activated.
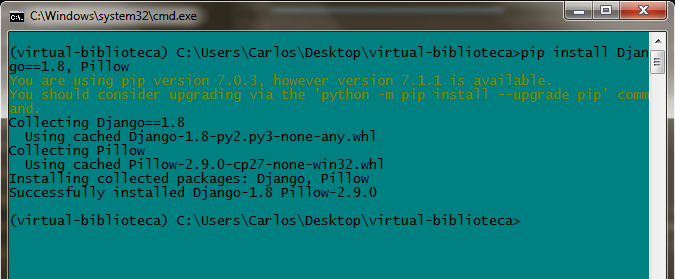
Finally, we must install Django in the environment, we will also need Pillow, a Python library for managing images, since later we will work with images in our app. Having said that, we write in our console pip install Django==1.8, Pillow and wait for them to be installed. It should be added that we must be located in virtual-library
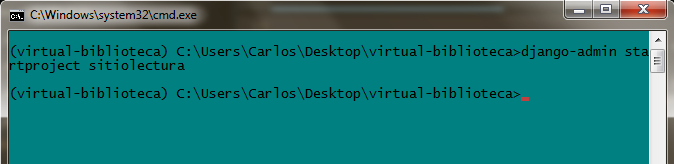
- Start the Project: If you don’t have Virtualenv on your machine, no problem, you can start from this step. Open the console, go to the
virtual-libraryfolder, (if you don’t have Virtualenv going to the desktop would be a good idea). and place in your consoledjango-admin startproject sitiolecturaand press enter.
This will create the necessary files to start a Django project, within this project we can create the applications we want, let’s look at what this folder looks like:
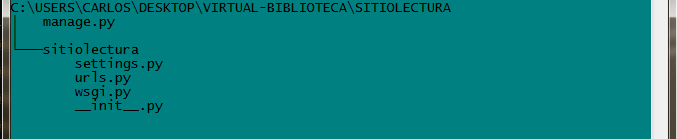
Within Sitiolectura, we have a manage.py file, this offers us interactivity with our project; and we have another folder called sitelectura where configuration files, url domains, the __init__.py file are present so that python recognizes that folder as a package, among other important files of our project. Finally, and in order not to make this post longer, we are going to create and register our app.
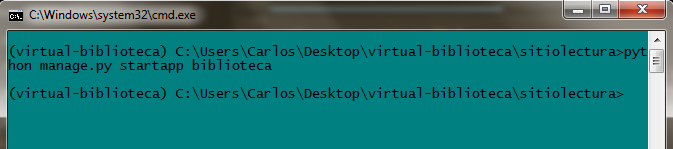
- Create our application: We open the console and at the same level where the
manage.pyfile is, we writepython manage.py startapp library, this will create a folder with the fundamental files that we will need as we build our application.
Ready, we have created our first Django application, the last step we have left to do is register said application in the project, let’s get to it.
- Register our application: This is the last step, we must register our application
libraryin our projectsitereading, this helps Django to know which application is linked to ‘x’ project. It is a fundamental step. We go to our project folder, that is,sitiolectura/sitiolecturaand we open the filesettings.py, we go to theINSTALLED_APPSpart and we put the following:
	INSTALLED_APPS = (
	    'django.contrib.admin',
	    'django.contrib.auth',
	    'django.contrib.contenttypes',
	    'django.contrib.sessions',
	    'django.contrib.messages',
	    'django.contrib.staticfiles',
	    'library',#With this line we register our app. Don't forget to put the comma at the end.
	)
We see that by default, when we build a Django project, it installs several applications, some for managing sessions, messages and authentication. A very useful app is the admin app, which we will see later.
Do you want to see the app work for the first time? Open a terminal and go to the same directory where the manage.py file is, then put python manage.py runserver and press enter. Then open your browser and enter the url localhost:8000. Congratulations, your first application with Django is working

Well that’s all for now, if you have any questions or if you got stuck on any step, you can let me know below in the comments box.
print("See you soon")Translated using GPT 5.3 Codex