
The Library, application in Django 1.8 | Part VII
- The Library, application in Django 1.8 | Part I
- The Library, application in Django 1.8 | Part II
- The Library, application in Django 1.8 | Part III
- The Library, application in Django 1.8 | Part IV
- The Library, application in Django 1.8 | Part V
- The Library, application in Django 1.8 | Part VI
- The Library, application in Django 1.8 | Part VII
Introduction
This is the last post in a series of posts that cover the construction of an application using Django in its version 1.8, we have studied some key concepts that this great web framework offers us, the quote that brings us together today is template inheritance, another very powerful feature that is worth learning to use, we are also going to improve the look and feel of our application a little, adding some style here and there. Let’s get to it.
Before you start
First of all, we must have our static files configured correctly. To do this, I recommend reading this post where it is clearly explained how to do this process. It’s not complicated, it’s just configuring a few variables, read it. To make things much more agile we are going to use Materialize a CSS framework based on material design.
Template inheritance in our application
In the previous post we covered the theoretical part of templates in Django, explaining what they are and what they are used for, I will only say that it is a very powerful feature that allows us to save code and better organize our interfaces.
We are going to create a new file that we will call base.html (inside the templates folder), in this file we are going to define all the common html code for all the other templates that we have already created in previous posts. Place the following:
<!DOCTYPE html>
<html lang="en">
<head>
  <meta charset="UTF-8">
  <meta name="viewport" content="width=device-width, user-scalable=no, initial-scale=1.0, maximum-scale=1.0, minimum-scale=1.0">
  <!-- minified jquery -->
  <script src="https://code.jquery.com/jquery-2.1.4.min.js"></script>
  <!--Materialize-->
  <!-- Compiled and minified CSS -->
  <link rel="stylesheet" href="https://cdnjs.cloudflare.com/ajax/libs/materialize/0.97.0/css/materialize.min.css">
  <!-- Compiled and minified JavaScript -->
  <script src="https://cdnjs.cloudflare.com/ajax/libs/materialize/0.97.0/js/materialize.min.js"></script>
  <!--Materialize Icons-->
  <link href="https://fonts.googleapis.com/icon?family=Material+Icons" rel="stylesheet">
  <title>{% block title %}{% endblock title %}</title>
</head>
In our base template we start by including the jquery and materialize scripts along with their styles. If you do not have an Internet connection, I recommend that you download them and include them manually, which is why you need to have the path of all these static files (CSS, JS and images) well configured.
We have also defined in the last line a block tag, this tag allows us to define “gaps” (so to speak), which will then be “filled” in other templates, later we will see what this is about.
In the same file (base.html) put the following:
  <body style="display:flex; min-height:100vh; flex-direction:column;">
<header>
<!-- Main menu -->
<nav>
  <div class="nav-wrapper teal darken-1">
    <a href="{% url 'site:index' %}" class="brand-logo">Welcome</a>
  <a href="#" data-activates="mobile-demo" class="button-collapse"><i class="material-icons">menu</i></a>
  <ul class="right hide-on-med-and-down">
    <li class="activate"><a href="{% url 'site:index' %}">Home</a></li>
    <li><a href="{% url 'site:create' %}">Create Book</a></li>
  </ul>
  <ul id="mobile-demo" class="side-nav">
    <li class="activate"><a href="{% url 'site:index' %}">Home</a></li>
    <li><a href="{% url 'site:create' %}">Create Book</a></li>
  </ul>
  </div>
</nav>
<!--end main menu -->
</header>
Here we have defined the main menu of our application, using url tags we indicate the path to follow after the user clicks on each link. Finally, we finish our base.html file with the following:
<main style="flex: 1 0 auto;">
  <div class="container">
  <div class="divider"></div>
   <div class="section">
     <h4>{% block section_name %}{% endblock section_name %}</h4>
     <p>{% block section_description %}{% endblock section_description %}</p>
   </div>
  {% block main %}
  <!--Specific content of each template-->
  {% endblock main %}
  </div>
</main>
<!--footer home -->
<footer class="page-footer teal darken-1">
  <div class="container">
    <div class="row">
      <div class="col l6 s12">
        <h5 class="white-text">My first application in Django</h5>
          <p class="grey-text text-lighten-4">The Library</p>
      </div>
    </div>
  </div>
  <div class="footer-copyright">
    <div class="container">
      © 2016 Copyright All rights reserved
    </div>
  </div>
</footer>
<!-- footer end -->
<!-- Javascript configuration and initializations -->
<script>
//Drop-down menu, necessary to activate the menu
//in a responsive size
$(document).ready(function(){
  $('.button-collapse').sideNav();
});
</script>
</body>
</html>
The block main tags will be where all the content will be found depending on the template, we use a block section for a small header as well as another block tag for a description. It should be added that main, section, section_description can be changed to other names; What matters is that the tags start with block and end with endblock. Finally we create a small footer.
We have already established our base, from which all our templates will inherit. Now all that remains is to define the specifics of each template. Let’s go first with allbooks.html, open it and place the following:
<!--We inherit from base.html-->
{% extends "library/base.html" %}
<!--we load static files-->
{% load staticfiles %}
<!--fill the gaps defined in base.html-->
{% block title %}Home{% endblock title %}
{% block section_name %}Home{% endblock section_name %}
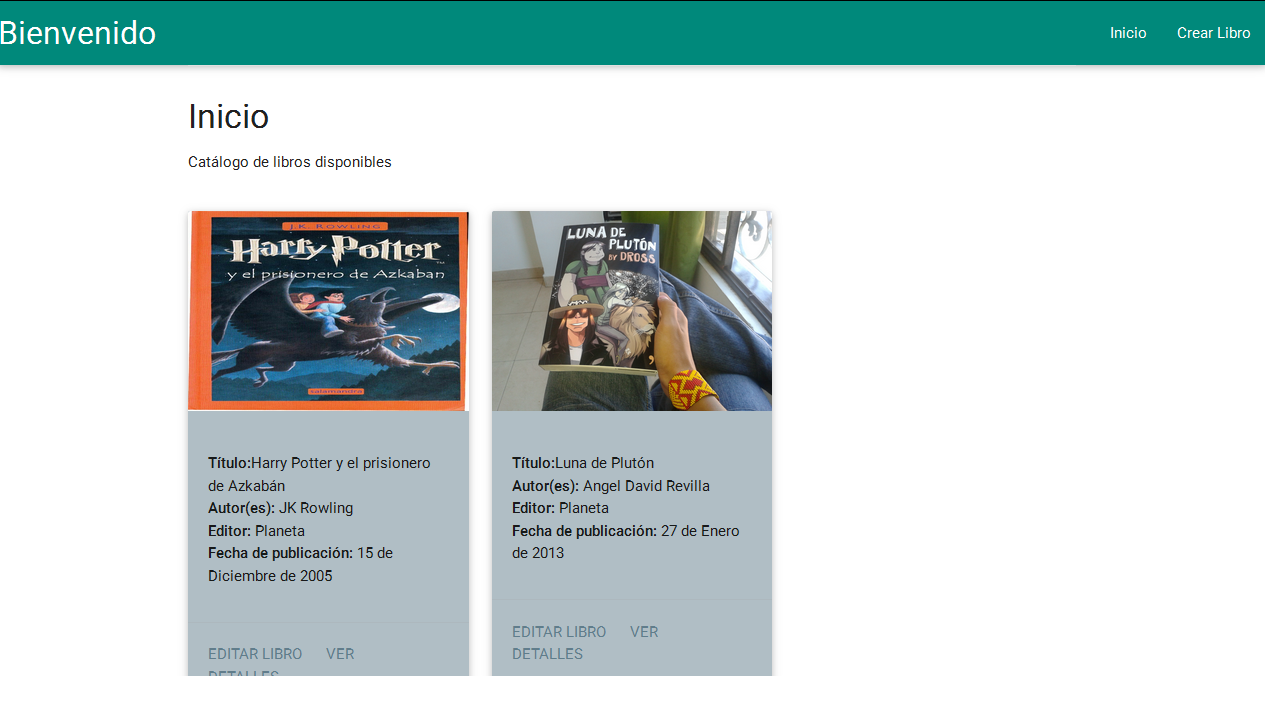
{% block section_description %}Catalog of available books{% endblock section_description %}
{% block main %}
<div class="row">
{% for book in object_list %}<!--object_list is the name that django gives by default to the list where the objects are (in this case books) -->
<!-- db books are displayed on a materialize image card -->
<div class="col s12 m4">
<div class="card blue-gray lighten-3">
<div class="card-image">
<img src="{% static book.cover %}" width="100px" height="200px">
</div>
<div class="card-content">
<ul>
{% for author in libro.autores.all %}
<li><strong>Title:</strong>{{ book.title }}</li>
<li><strong>Author(s): </strong>{{ author.name }} {{ author.last name }}</li>
{% endfor %}<!--end for internal-->
<li><strong>Editor: </strong>{{ book.publisher }}</li>
<li><strong>Publication date: </strong>{{ book.publication_date }}</li>
</ul>
</div>
<div class="card-action">
<a href="{% url 'site:update' libro.pk %}"><span class="blue-grey-text">Edit book</span></a>
<a href="{% url 'site:detail-book' libro.pk %}"><span class="blue-grey-text">View Details</span></a>
</div>
</div>
</div>
{% empty %}<!-- What happens when there are no books? -->
<div class="row">
<div class="col s12 m6 l6 offset-l3">
<div class="card blue-gray lighten-3">
<div class="card-content black-text">
<span class="card-title black-text"><strong>No books available</strong></span>
<p>There are currently no books on the platform, but you can create one if you want.</p>
</div>
<div class="card-action">
<a href="{% url 'site:create' %}"><span class="blue-grey-text">Create a book</span></a>
</div>
</div>
</div>
</div>
{% endfor %} <!--end for external-->
</div>
{% endblock main %}
The first thing we do is inherit from the base.html file, then we load the static files that in our case will only be images (the covers of our book). For this we use the load staticfiles tag, we have also used a couple of new tags, the for tag and the empty tag.
The for tag allows us to go through all the elements of a list, in our case object_list is the list of books that it will go through. For each book in the list we will show its name, cover, authors, publisher and publication date. On the other hand, the empty tag allows us to control what happens when the list to be traversed is empty, in our case we will only show a message when that happens.
Let’s see how it turns out, run the server, you already know python manage.py runserver (if like me, you have the project on virtualenv, activate it first). If you put http://localhost:8000/biblioteca/ you should see the following.
Below we have put two links that redirect to the editing and details templates, each one has the following:
- Details template (detailbook.html):
{% extends "library/base.html" %}
{% load staticfiles %}
{% block title %}Details{% endblock title %}
{% block section_name %}Details{% endblock section_name %}
{% block main %}
  <div class="row">
    <div class="col s12 l4 m5">
      <div class="card hoverable" width="100px" height="200px">
            <div class="card-image">
              <img src="{% static object.cover %}">
            </div>
            <div class="card-content blue-gray lighten-5">
              <span class="card-title" style="color:#546e7a;"><strong>{{  object.title }}</strong></span>
            </div>
        </div>
    </div>
    <div class="col s12 l8 m7">
      <table class="hoverable">
        <thead class="hoverable blue-gray lighten-3">
          <tr>
            <th>Title</th>
            <th>Author</th>
            <th>Editor</th>
            <th>Publication date</th>
          </tr>
            </thead>
            <tbody class="blue-grey lighten-5">
              <tr>
                <th>{{object.title }}</th>
                <th>{{ object.authors.get }}</th>
                <th>{{ object.editor }}</th>
                <th>{{ object.publication_date }}</th>
              </tr>
            </tbody>
      </table>
      <div class="row">
        <div class="col l12 m12 s12 ">
          <h3>Synopsis</h3>
          <p>{{ object.synopsis }}</p>
        </div>
      </div>
        <a href="{% url 'site:delete' object.pk %}" class="btn-floating waves-effect waves-light tooltipped teal darken-1" data-tooltip="Delete Book"data-position="right"><i class="material-icons">delete</i></a>
    </div>
  </div>
{% endblock main %}
If you click on details, you will see the following:

There’s not much to say here, we’ve simply organized the book information in a table and used the materialize grid to give it a better look. You may be wondering what the heck is object.authores.get, as you know each Book has one or more Authors, this in turn is a model and we can use the Django Models API to bring all the authors associated with a particular book, that is what we have done.
At the end we have put a link to delete the book, this redirects us to the delete confirmation view.
- Editing template (uc_libro.html):
{% extends "library/base.html" %}
{% block title %}Lecutra Site{% endblock title %}
{% block section_name %}Let's do it!{% endblock section_name %}
{% block main %}
  <form action="" enctype="multipart/form-data" method="POST">{% csrf_token %}
    <div class="row">
      <div class=" col s12 m8 offset-m6 l6 offset-l3">
        <div class="card blue-gray lighten-3">
          <div class="card-content">
            <table>
              {{ form.as_table }}
            </table>
          </div>
          <div class="card-action">
            <button class="btn waves-effect waves-light blue-grey" type="submit" name="create" value="create">Submit</button>
          </div>
        </div>
      </div>
    </div>
  </form>
  <script>
    // For the correct functioning of the dropdowns present in the select form
    // this script must be included
    $(document).ready(function() {
      $('select').material_select();
    });
  </script>
{% endblock main %}
This template is also used in the creation of books, as we saw in the last entry, Django renders this template depending on the action to be performed (sometimes it seems smart :o). There is not much to say here either, we have simply changed the appearance by inheriting from our base and improving the appearance of the form.

The small script below must be placed for the dropdown lists to work correctly.
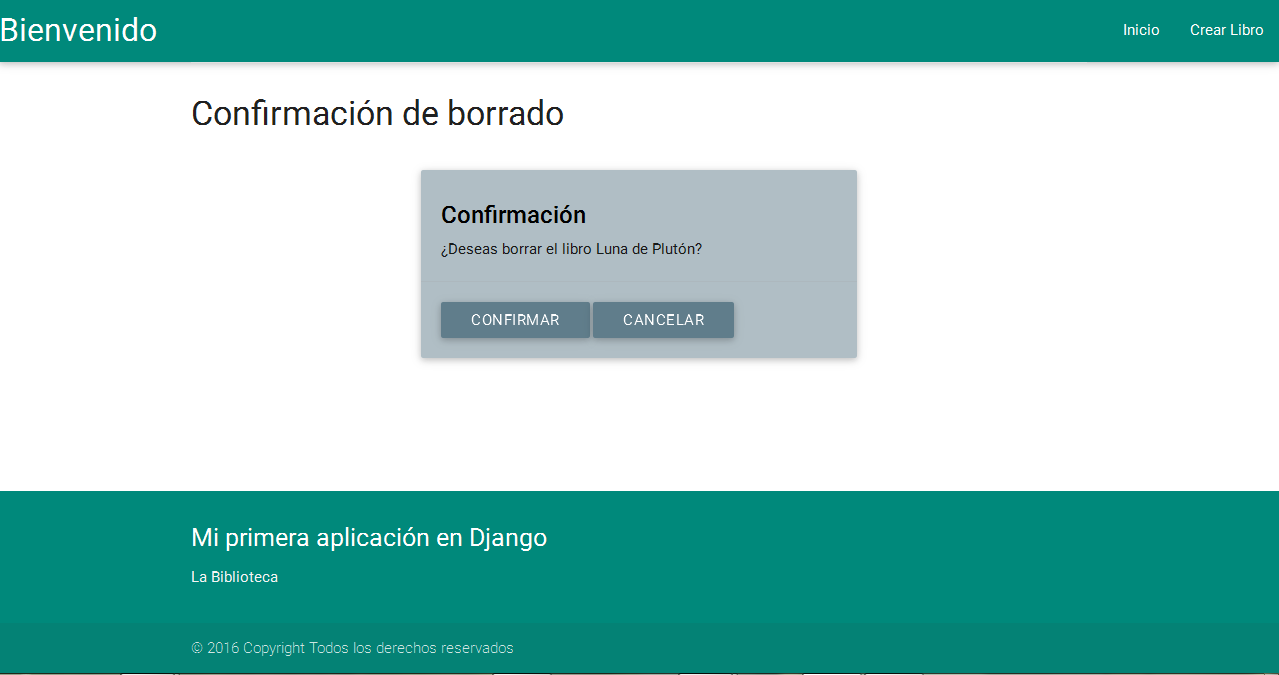
Finally, the deletion confirmation template looks like this:
- Delete confirmation (book_confirm_delete.html):
{% extends "library/base.html" %}
{% block section_name %}Deletion confirmation{% endblock section_name %}
{% block main %}
  <form action="" method="POST">{% csrf_token %}
    <div class="row">
      <div class=" col s12 m8 offset-m6 l6 offset-l3">
        <div class="card blue-gray lighten-3">
          <div class="card-content">
            <span class="card-title black-text"><strong>Confirmation</strong></span>
            <p>Do you want to delete the book {{ book.title }}?</p>
          </div>
          <div class="card-action">
            <button class="btn waves-effect waves-light blue-gray"
            type="submit">Confirm</button>
            <a class="btn waves-effect waves-light blue-gray white-text"
             href="{% url 'site:index' %}">Cancel</a>
          </div>
        </div>
      </div>
    </div>
  </form>
{% endblock main %}
When you click the delete book button, you are redirected to the following confirmation view:
Everything looks better now, don’t you think? The truth is that Materialize is a nice framework, although we haven’t used all of its components, it has changed the look and feel of our app a lot quickly and easily. The code for all entries will be hosted on Github in this repository, I hope you have learned a little about the features of Django and are encouraged to continue on your own. Not being more, see you in a next entry.
print("See you soon")Translated using GPT 5.3 Codex